Pipeline schema
Pipeline schema files describe the structure and validation constraints of your workflow parameters. They are used to validate parameters before launch to prevent software or pipelines from failing in unexpected ways at runtime.
You can populate the parameters in the pipeline by uploading a YAML or JSON file, or in the Seqera Platform interface. The platform uses your pipeline schema to build a bespoke launchpad parameters form.
See nf-core/rnaseq as an example of the pipeline parameters that can be represented by a JSON schema file.
Define pipeline schema
When adding or editing a pipeline, you can select one of three schema options to control parameter validation and the launch form:
- Repository default: Use the default schema provided by the Pipeline git repository.
- Repository path: Use a schema at a specific path in the repository.
- Seqera Platform schema: Use a Nextflow JSON schema stored in Seqera Platform (overrides repository).
The selected schema controls which pipeline parameters are exposed in the launch form. This allows you to restrict the parameters visible to launch users, simplifying the launch experience and preventing modification of parameters that should remain fixed.
Seqera Platform schema
Users with Maintain or higher permissions can upload a custom nextflow_schema.json file directly to Seqera Platform. When you upload a Platform schema:
- The schema content is validated to ensure it's a valid JSON schema
- The Platform schema controls which parameters appear in the pipeline launch form
- Changes to the Platform schema trigger a new draft version of the pipeline
- The Platform schema is applied to all launches using that pipeline version
To add or update a Seqera Platform schema:
- Navigate to Add pipeline or select Edit for an existing pipeline
- Select Seqera Platform schema from the schema options
- In the Seqera Platform schema field, paste your custom Nextflow schema JSON
- The schema is validated automatically as you enter it
- Select Add or Save to create a new draft version with the Platform schema
The schema id field must be unique. If you're pasting pipeline schema contents from an existing pipeline schema file, ensure you update the id field to a unique value.
Building pipeline schema files
The pipeline schema is based on json-schema.org syntax, with some additional conventions. While you can create your pipeline schema manually, we highly recommend using nf-core tools, a toolset for developing Nextflow pipelines built by the nf-core community.
When you run the nf-core schema build command in your pipeline root directory, the tool collects your pipeline parameters and gives you interactive prompts about missing or unexpected parameters. If no existing schema file is found, the tool creates one for you. The schema build commands include the option to validate and lint your schema file according to best practice guidelines from the nf-core community.
The nf-core community creates the schema builder but it can be used with any Nextflow pipeline.
Customize pipeline schema
When the skeleton pipeline schema file has been built with nf-core schema build, the command line tool will prompt you to open a graphical schema editor on the nf-core website.
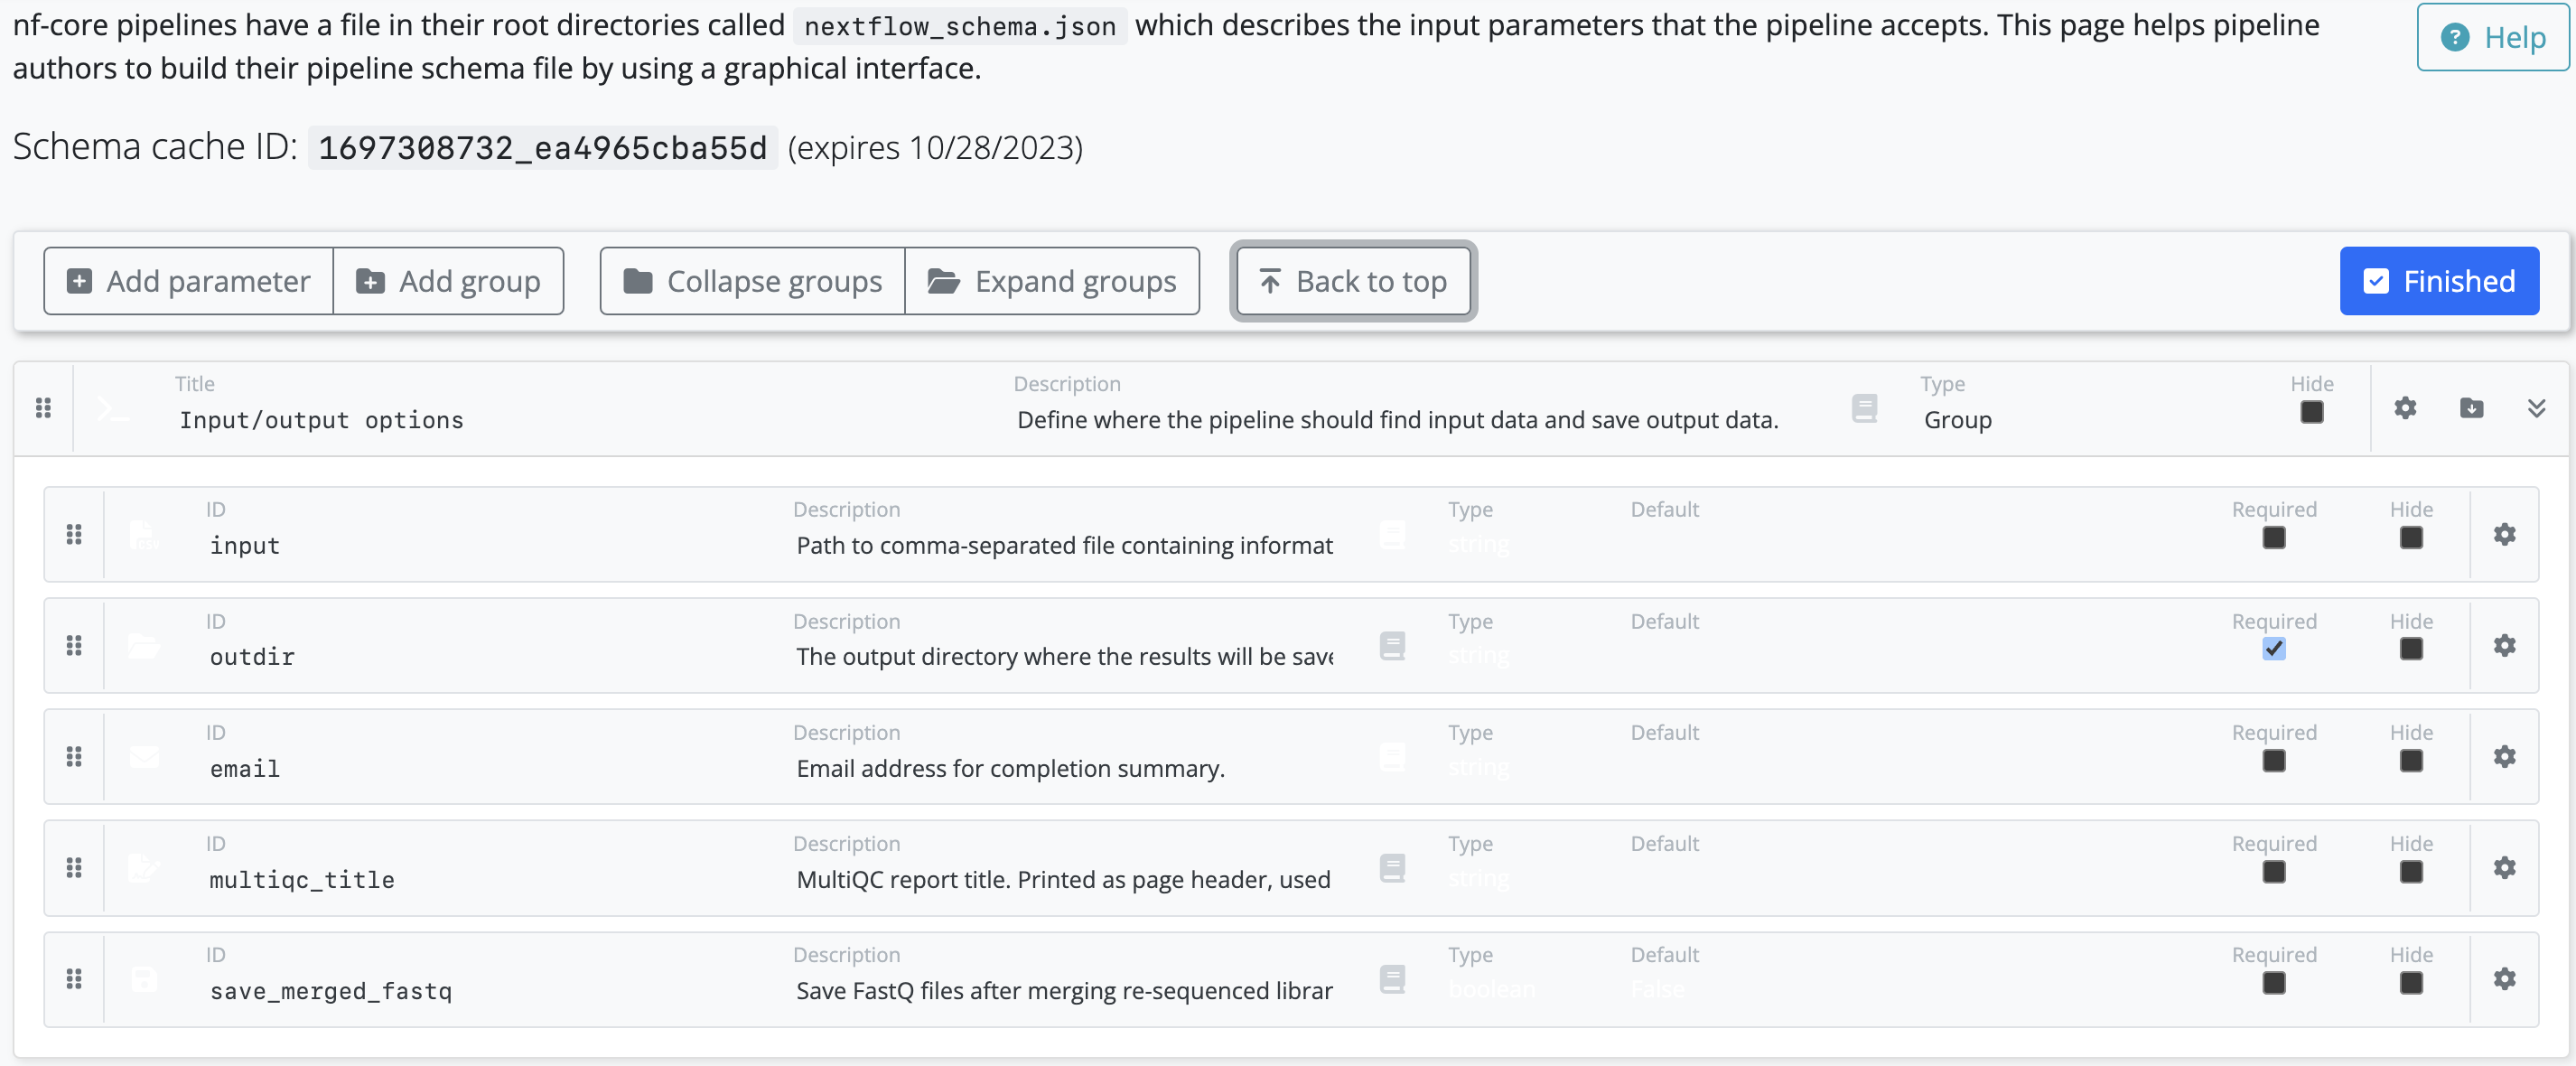
Leave the command line tool running in the background as it checks the status of your schema on the website. When you select Finished on the schema editor page, your changes are saved to the schema file locally.